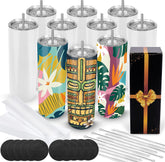
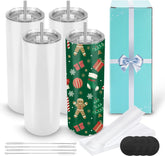
Can you sublimate tumblers in a regular oven?
Yes, you can sublimate tumblers in a regular oven, and many people use this method successfully, especially when they don't have access to a tumbler heat press. However, it requires some careful preparation and attention to detail to ensure the best results.

Here’s a step-by-step guide to help you sublimating tumblers in a regular oven:
1. Preparation:
- Tumbler Selection: Make sure your tumblers are made from sublimation-ready materials, typically stainless steel with a polymer coating.
- Design & Paper: Print your design onto sublimation paper using sublimation ink, ensuring it’s high quality and the right size for your tumbler.
- Tape: Secure the printed design tightly to the tumbler with heat-resistant tape. Make sure it’s aligned properly.
2. Using a Shrink Wrap (Optional but Recommended):
- Shrink Wrap Sleeve: A shrink wrap sleeve is often used to help the design adhere evenly to the tumbler. Place the shrink wrap sleeve around the tumbler, then use a heat gun to shrink it around the tumbler, holding the design securely in place. This step ensures an even application of heat.
- Alternatively: If you don’t have shrink wrap, just make sure your design is taped securely without gaps, and the paper is pressed firmly against the tumbler.
3. Oven Settings:
- Preheat the Oven: Preheat your oven to around 375°F to 400°F (190°C to 204°C).
- Bake Time: Tumblers typically need to be in the oven for about 6 to 8 minutes. However, the exact time can vary depending on your oven and the specific tumblers, so some testing is helpful.
4. Baking Process:
- Rack Positioning: Place your tumbler directly on the oven rack or use a silicone baking mat to hold it steady. If you’re using shrink wrap, the sleeve will keep the tumbler in place.
- Rotating Tumblers (If Needed): If you’re not using a convection oven (which circulates hot air), you should rotate the tumbler halfway through the process to ensure even heating.
- Watch for Hot Spots: Regular ovens can have inconsistent heat distribution, so be vigilant about ensuring even coverage.
5. After Baking:
- Cooling: Carefully remove the tumbler from the oven (it will be very hot), and let it cool down before handling.
- Check the Transfer: Once it has cooled, inspect the tumbler for even coverage and color quality. The design should be vibrant and clear, with no fading or ghosting.
6. Final Adjustments:
- If your first attempt doesn't come out perfect, adjust the time, temperature, or positioning until you achieve a consistent result.
Pros and Cons of Using a Regular Oven:
-
Pros:
- Can accommodate multiple tumblers at once if you have a convection oven.
- A great option if you don’t have a tumbler heat press.
-
Cons:
- It can be tricky to get the even heat distribution needed for perfect results.
- Requires more attention and testing to dial in the correct time and temperature.
If you’re just starting out, I’d recommend testing with a small batch to fine-tune your method. Once you get it down, an oven can be a great, cost-effective tool for sublimating tumblers! Have you tried this method before, or are you looking to give it a shot for the first time?


Leave a comment
Please note, comments need to be approved before they are published.